This fairy garden is a combination of my two loves... miniatures and gardening. I'm no pro, but this is the fourth fairy garden I've created. My original fairy garden took a beating this past winter, so I decided to replace it with this one. The other two were starter gardens that were gifts for my mom and my auntie. Maybe I will eventually share photos of those, too.
*WARNING* Today's post is very photo and text heavy, so if you like lots of photos-- fabulous! You're in the right place. If not-- well, please try to endure. I hope you won't be disappointed!
Well, let's start at the beginning. The sweet mushroom house above is actually a birdhouse that's been sitting in my playroom/studio since last summer. The terra cotta flower pots were from my miniature collection. I shopped my garage and studio for things to use in this project. You would be surprised at what I could dig up around here. Well, if you know me in "real life", maybe it's no surprise. (Did I hear someone whisper "hoarder"? Yeah, I won't deny it.)

This garden arch is the first thing I purchased for my fairy garden. I've planted a wire vine next to it, and it seems to be training up the lattice quite well. I purchased this arch and the two little planters at The Antique Gardener in Sutter Creek about four or five years ago and they've held up quite well. It's fun to have a structure or two in the garden. This time I built some stone steps climbing up to the arch and sprinkled and packed some small gravel between them. I hope to grow some moss between the stepping stones in the garden someday. Wouldn't that be pretty?

I just wanted to show you a close up of the little table of goodies that the fairies put under the arch for the party. Do you like the little sage leaf table runner? I love little natural touches like that. The fairies took the inspiration for their goodies from Meg. (They went right back into the dollhouse after the party. I didn't want to leave these out permanently because they would probably deteriorate outside!)

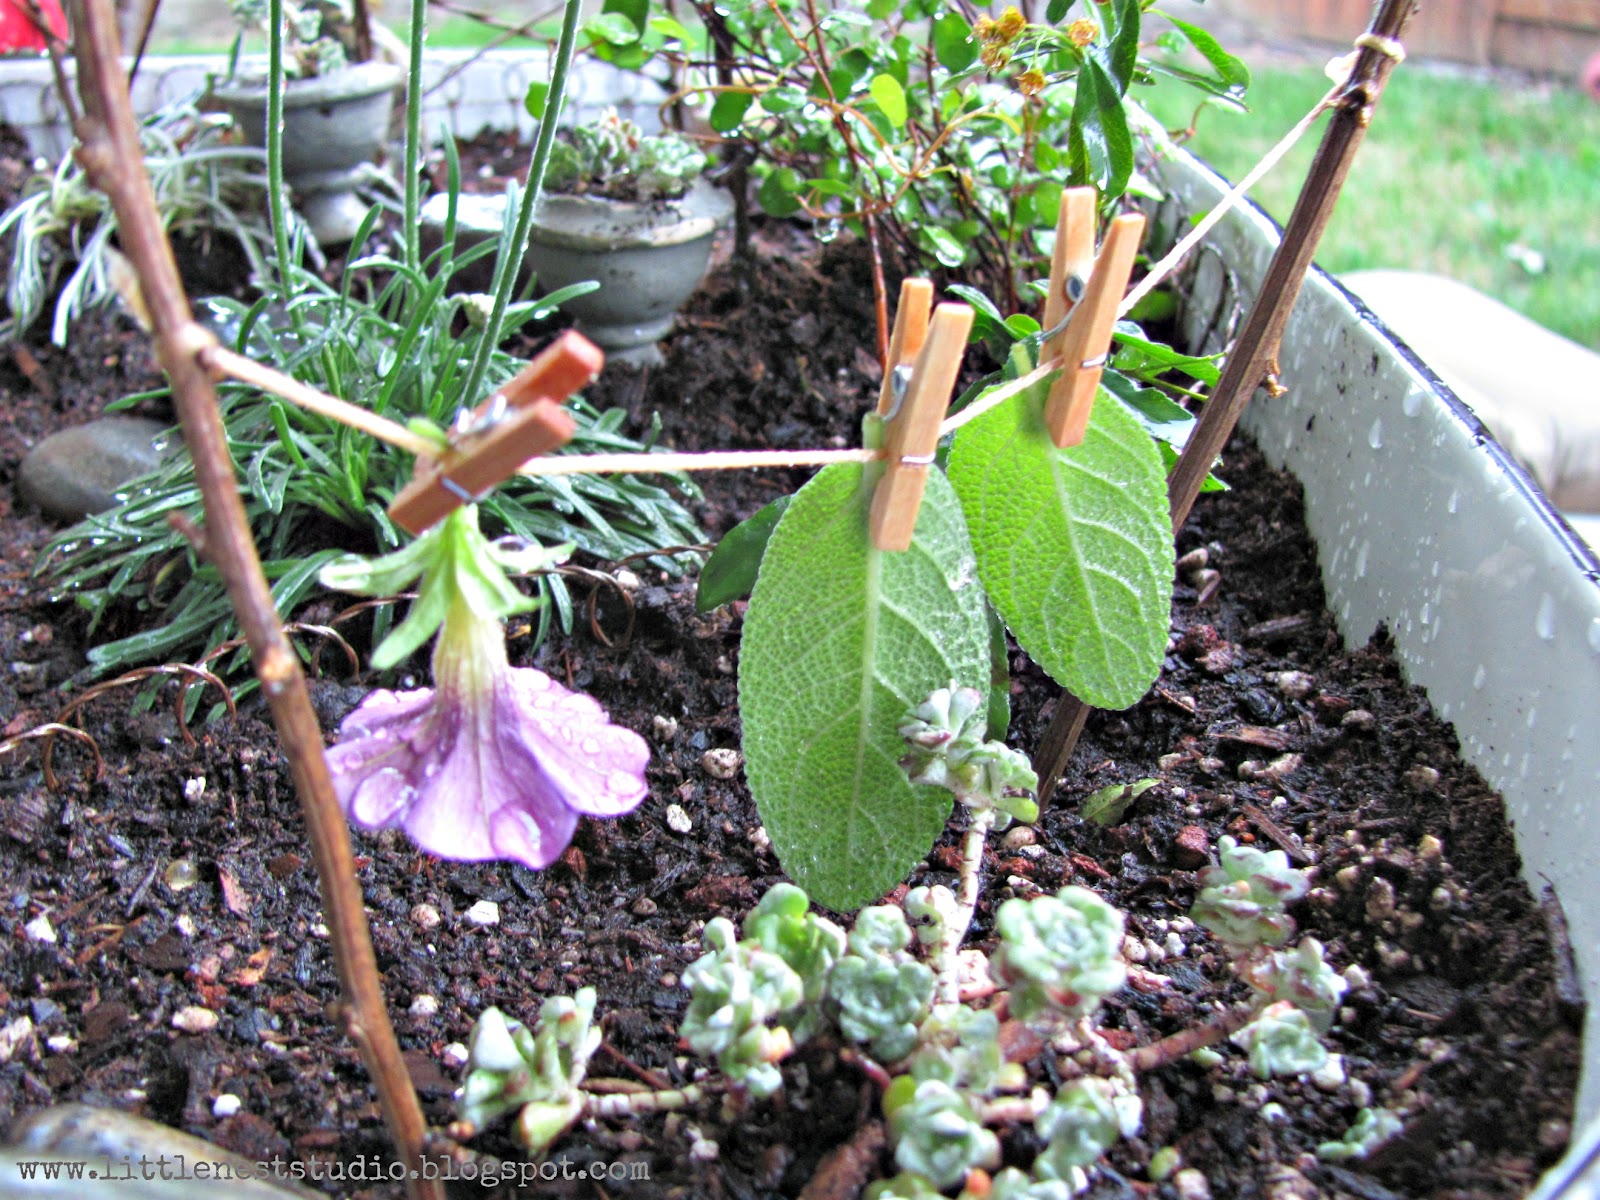
This little clothesline is one of my favorite things about this little garden. It was so easy to build. I just found two sticks in my yard and strung them together with embroidery floss. The little clothespins came from Michaels.

Yes, this photo was taken on a different laundry day. (Note: a different "skirt" on the clothesline.) I felt like a little girl playing with dolls when I, uh, helped the fairies hang the laundry. After the laundry was done, the fairies used those garden tools to clean up the mess that the gnomes left. They just waved the tools around and twirled about and... POOF! The mess was gone, and every leaf was in place again. I wish that trick would work for me, here around the house.

When the fairies aren't working, they're playing. They love to catch teeny tiny butterflies with their net. They always let them go after a few minutes though. They're kind of sensitive about anything with wings. You can read about that adorable tiny butterfly jar here.

When the fairies need to sit for a bit they either lounge around on the lawn by the clothes line, or they sit on this little vine twig chair. I found this little chair and clay pillow at The Secret Garden in Elk Grove.

Here's a view of this corner... there's actually a lot going on here. This tiny path was created from chips off of my own garden path, and the wire edging is from my favorite garden center of all time, Fair Oaks Boulevard Nursery. I.love.that.place. If you are ever in the Sacramento area, take the opportunity to go there. I always leave there feeling inspired.

This photo has a great variety of textures in it... the rocks, the three different types of foliage, and the metal pieces. It's so fun to place cute little accessories around the garden. I think little details add so much charm and character to these little gardens.

I love this sweet little birdbath. When I water the garden each morning, I always try to put some water in it. Yeah, I get excited about little things like that.

Doesn't this plant look like some kind of dwarf succulent? Love, love, love it. It may be a small variety of sedum, but I can't remember. I love how the leaves catch the water each morning. I will list some great plants for fairy gardens at the end of this post... hang in there.

From above... so you can really see the layout.

Daytime...

...and nighttime! I love these little lights I bought last year from QVC. They're battery operated and have a built-in timer. The lights are each the size of a piece of rice, and they're strung on a fine wire... perfect for the fairy garden. I wouldn't have thought to put these lights in my fairy garden if it weren't for the inspiration from my friend, Lisa. As far as I've seen, her garden is the only one with lights. Placing lights in a fairy garden is such a brilliant idea!

I love to see the fairy garden aglow in the evenings... it makes me so happy. I find myself peeking through the window and going out to see it each night. (Just another photo of the fairy garden party--prior to being crashed by the gnomes.)

I must say, this has been one of the most fun projects I've done in a long time. Building this fairy garden took me to a whole different level of happy. That kind of happy you feel as a little girl, totally immersed in playing make-believe. It makes my heart happy every time I look at it. I hope it made your heart happy too.
Hugs,
Jill
*** But wait-- there's more! You can build some happy too! Here are some resources for plants, accessories, and more pointers on how to build your own miniature fairy garden. Note that I have not been paid to promote these sites. (But I should be.*giggle*) If any of you have more tips, ideas or favorite sources for ideas, please feel free to share! There's so much out there~
Plants For Fairy Gardens: Look for low growing plants like ground covers and moss. I've incorporated some bonsai plants in this garden and so far they're doing well. When planting, keep in mind that the watering needs may be different for each plant. Succulents won't need to be watered as much as moss. I like to plant where my heart tells me, so I'm just careful when I water the plants. Below are the names of some of the plants that I've used in fairy gardens:
Japanese Snowbell (the flowering bonsai tree on the right side of the mushroom house)
Dwarf Horsetail (I love the texture of this one-- it's shown on the left side of the mushroom house)
Sedum Spathulifolium "Cape Blanco"
Dwarf Blue Toadflax
Pyracantha "Fiery Cascade" Firethorn
Irish Moss
Saxifraga "Pearly King" (The flowers look like miniature cherry blossoms!)
Corsican Mint (Very low growing, and smells soooo good!)
Succulents (Whatever suits your fancy- the younger the plant, the better it fits.)
Hardscape Materials For Fairy Gardens: Materials for your paths, etc. Some of this can be found in your own backyard. "Look at things with a mini eye", as my miniaturist friends would say. Consider the scale you are working with and and the textures. (Confession: the scale of my 'shroom house and my arch don't match up. But hey-- it's what I already had around the house! Seriously-- in the end, just do what makes you happy.)
Gravel: The smaller, the better. You can find smaller gravel in the bonsai department of your local garden center. I actually used the gravel that was layered on top of the soil that my succulents and bonsai plants were in when I bought them. (Recycle, re-use!)
Small Pebbles: Again, the smaller the better. Check your garden center. You can find medium to small pebbles in the florist section at craft stores, like JoAnns.
Sand and/or Ground Capiz Shells: They can be found at JoAnns in the florist section. The capiz shells are great for building a shiny, sparklie path!
Stones: I found mine in my own yard... keep your eyes to the ground and you'll eventually find some!
Soil: Okay, this one's a toss up. Basically, you just want to have well-draining soil. Be sure there are drain holes in whatever container you use. I drilled holes in the bottom of my galvanized tub (that I shopped from my garage!), filled it a third of the way with water bottles (so it wouldn't be heavy), then topped it with potting soil. I put a top layer of bonsai soil on my garden, but it probably isn't necessary. You can even plant the succulents/bonsai plants, container and all, in the potting soil according to my friend. I would have never thought of that!
Accessories For Fairy Gardens:
I love this part! Remember, you can build your own furniture, structures, stepping stones, etc.-- but if you would rather purchase them...
http://www.fairywoodland.com/index.php More than just shopping~ lots of sweet fairy information. I love this site.
http://www.miniature-gardens.com/ I've always loved this site. They have many of the accessories that I found locally, plus lots and lots more. Great shopping-- especially if you're just getting started.
http://www.finefairyhouses.com/index.html This site also carries a lot of metal accessories.
http://www.twigwizardry.com/index.php The furniture-- ahhhh! It's beautiful! Looks like they may be swamped with orders right now, but be sure to stop by for the inspiration.
More Inspiration For Fairy Gardens:
Fairy Garden Flickr Groups:
Miniature Backyard Fairy Gardens http://www.flickr.com/groups/67466181@N00/
Mini Garden http://www.flickr.com/groups/minigarden/
Pinterest: (Of course!)
These girls have a great board to springboard ideas from... http://pinterest.com/sabowman/fairyland/
Blogs:
The Magic Onion~ This is such a sweet blog, full of ideas for creating your own little woodland miniature garden. http://themagiconions.blogspot.com/p/fairy-gardens_17.html
There are a lot more ideas out there, but I hope this gives you a good start. Thanks so much for stopping by. It means a lot to me to be able to share the happy with all of you. Okay-- now go have fun! oxo
(Whew!)